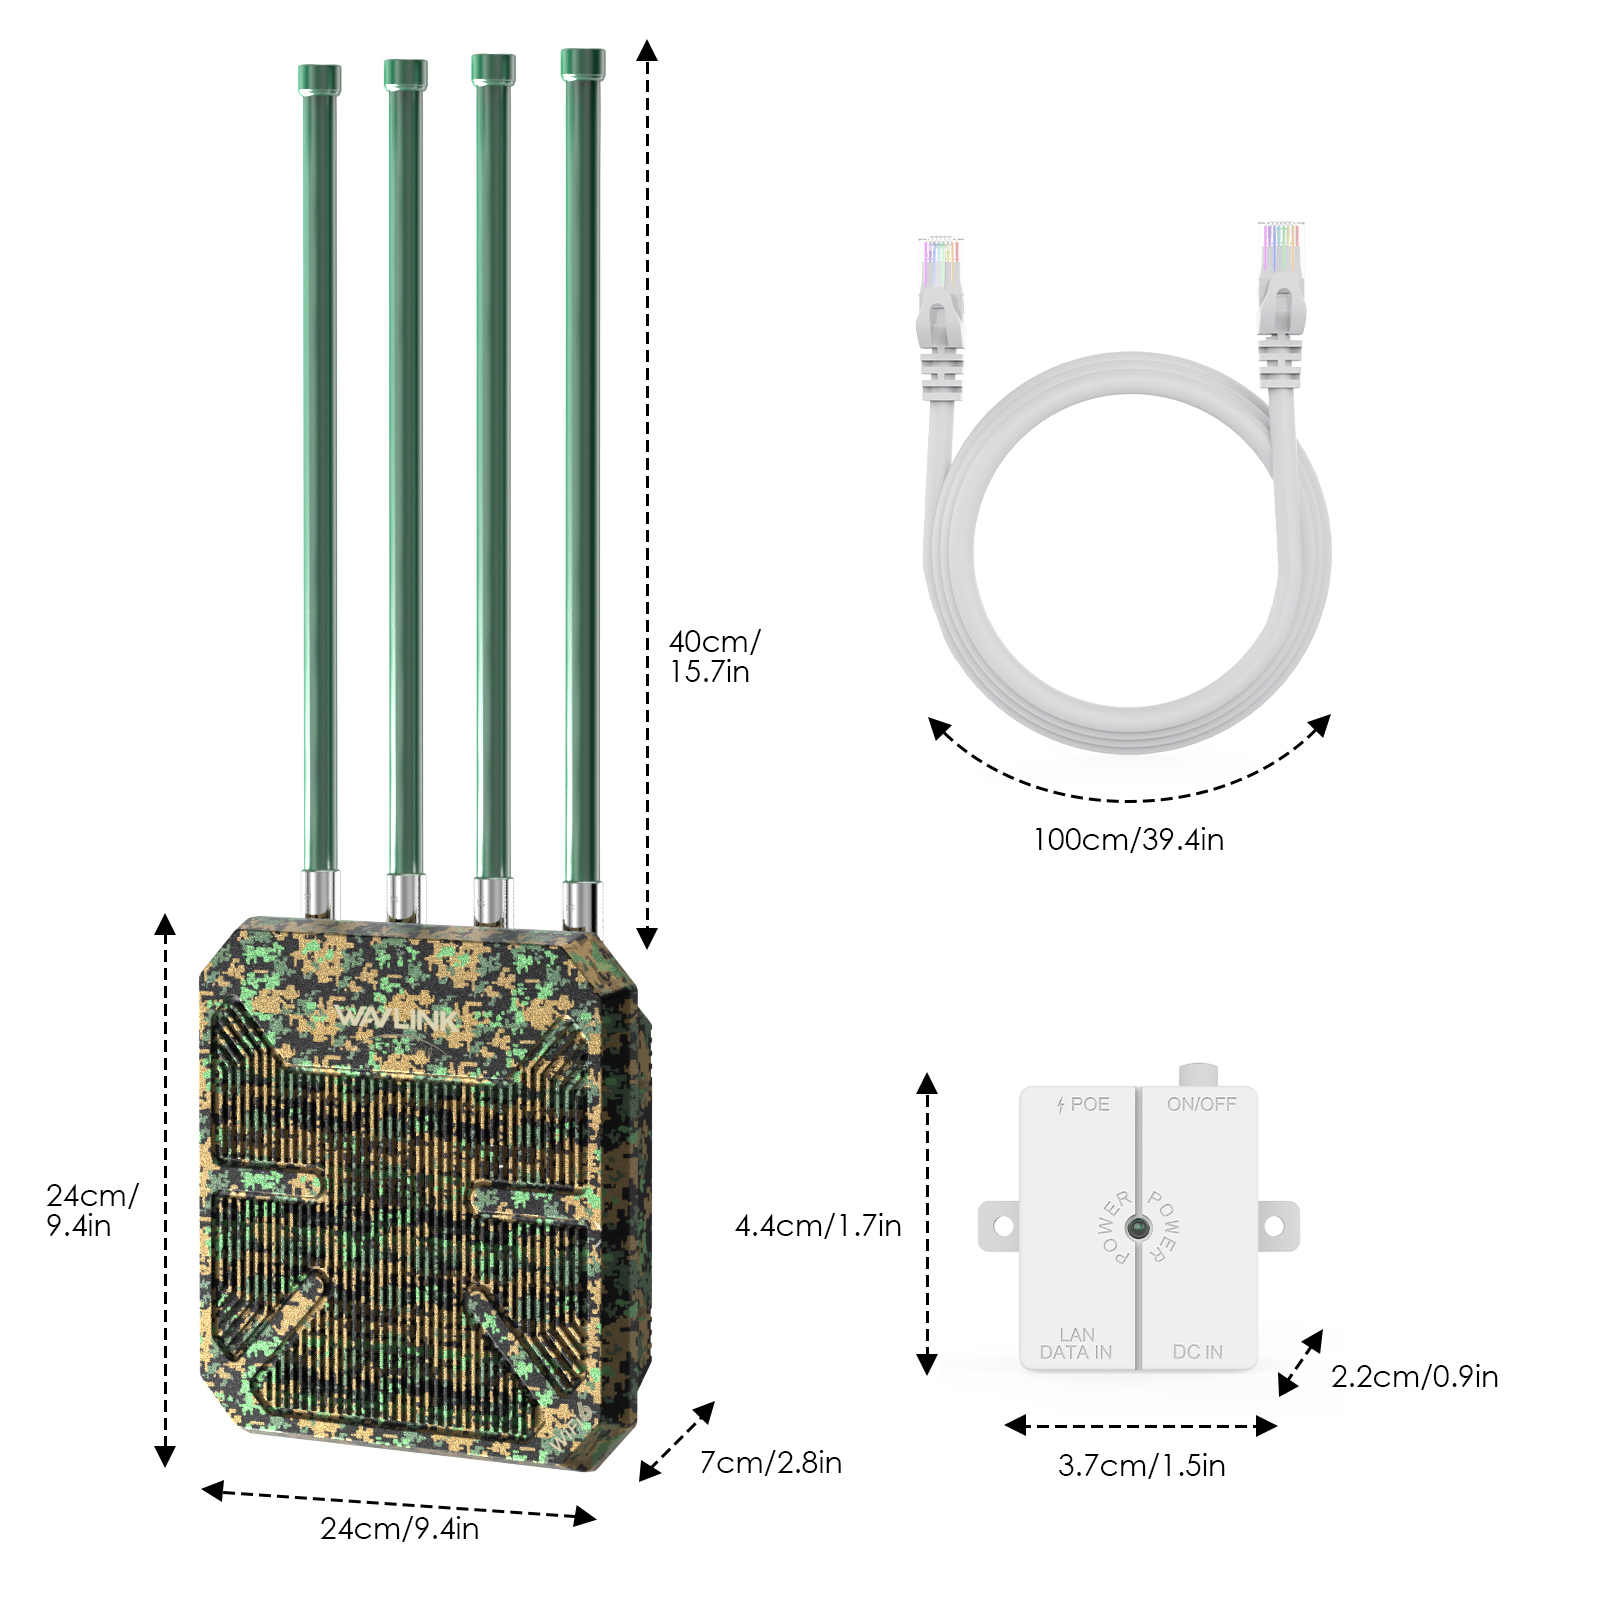
To ensure that the WAVLINK WN573HX series routers perform optimally in outdoor environments, it is crucial to master some special installation techniques. Here are some practical installation tips to help you easily create an efficient and stable outdoor WiFi network:

Choose the Right Location
l Higher Ground: Install the router in a higher location, such as the top of a fence, a high exterior wall of a building, or a dedicated pole. This can effectively reduce interference from ground obstacles and lower the risk of water immersion. For example, in a courtyard, choose an open area away from shrubs and tree cover to ensure that the signal covers the entire outdoor area without obstruction.
l Away from Interference Sources: Avoid strong electromagnetic interference sources, such as transformers, microwaves, and cordless phones. These devices may interfere with the router's wireless signal, affecting network stability. Also, stay away from large metal objects, as metal can reflect and absorb WiFi signals, reducing their strength.
Use Professional Tools for Installation
l Level: During installation, use a level to ensure that the router base is horizontal. Horizontal installation helps the router's internal components to dissipate heat properly and also ensures the verticality of the antennas, allowing the signal to spread evenly in all directions. For example, place the level on the router base and adjust the base until the bubble is centered to ensure a level installation.
l Drill and Expansion Bolts: For wall installation, use a drill to make holes at the selected location and then insert expansion bolts. Secure the router's bracket to the expansion bolts to ensure that the router is firmly installed on the wall and will not loosen due to wind and rain. Choose the appropriate drill bit size and bolt length to accommodate different wall materials.
Leverage the Advantages of Fiberglass Antennas
The fiberglass antennas equipped with the WAVLINK WN573HX series routers have unique materials and characteristics. To ensure optimal wireless signal coverage and performance of the router, it is essential to master some special techniques during installation.
Ensure Vertical Antenna Installation
Since fiberglass antennas cannot be angled and can only be installed vertically, it is crucial to ensure the verticality of the antennas when installing the router. Use tools such as a level or a vertical ruler to assist in calibration and ensure that the antenna is perpendicular to the ground. Vertically installed antennas can evenly disperse the signal in all directions, achieving omnidirectional coverage. This is particularly important for open outdoor areas, as it maximizes the antenna's gain, enhancing signal strength and coverage range.
Choose the Right Installation Height
The installation height significantly affects the signal propagation of fiberglass antennas. Generally, it is ideal to install the router at a height of 2-3 meters. This height effectively avoids interference from ground-reflected signals and also reduces obstruction from surrounding low obstacles. For example, in a courtyard, the router can be installed on top of a fence or a high pole to ensure that the signal smoothly covers the entire courtyard.
Avoid Strong Electromagnetic Interference Sources
Although fiberglass antennas have some resistance to interference, it is still necessary to stay away from strong electromagnetic interference sources, such as transformers, microwaves, and cordless phones, during installation. These devices may interfere with the router's wireless signal, affecting network stability. Also, avoid large metal objects, as metal can reflect and absorb WiFi signals, reducing their strength.
Waterproof and Dustproof Treatment
l Seal Interfaces: During installation, ensure that all interfaces are well-sealed. Use waterproof tape or special waterproof connectors to tightly wrap or connect interfaces such as power cords and network cables to prevent water seepage. For example, at the point where the power cord enters the router, wrap it with waterproof tape for several rounds and then put on a waterproof connector for double waterproofing.
l Regular Cleaning: Although the router has an IP67 waterproof and dustproof rating, it is still necessary to regularly clean surface dust and dirt. Use a soft cloth or cotton swab dipped in a small amount of alcohol to gently wipe the router's casing and antennas to prevent dust from clogging the heat dissipation holes or affecting signal transmission. Regular cleaning helps maintain good heat dissipation and stable operation of the router.
l Waterproof Loop: In outdoor environments, waterproof treatment of network cables is particularly critical. Create a loop of two to three circles with a diameter of about 10 centimeters with the network cable entering the room and the one entering the device. This ingenious design effectively prevents water from dripping into the room and the device along the network cable. When rainwater flows down the network cable, the loop forms a water drop collection point. The water droplets will naturally fall off when they accumulate to a certain extent and will not continue to penetrate along the network cable towards the device or indoors. At the same time, ensure that all network cable interfaces are well-sealed and reinforced with waterproof tape or special waterproof connectors.

Optimize Network Settings
l Adjust Channels and Bands: Log in to the router's management interface and manually adjust the wireless channels and bands according to the surrounding WiFi signal conditions. Choose a channel with less interference to avoid conflicts with neighboring WiFi networks. Also, reasonably allocate the bandwidth of the 2.4GHz and 5GHz bands, prioritizing high-speed data transfer services (such as video, games) to the 5GHz band, while allocating daily browsing, file downloads, and other services to the 2.4GHz band to improve overall network efficiency.
l Set QoS Priorities: Set Quality of Service (QoS) priorities for different network applications. For example, set high priorities for applications with high real-time requirements, such as video conferences and online games, to ensure they receive sufficient bandwidth and stable connections during network congestion. This optimizes the allocation of network resources and enhances the network experience for key services.
Security Measures
l Change Default Password: Immediately change the default administrator password after the first installation and login. Set a complex and hard-to-guess password that includes uppercase and lowercase letters, numbers, and special characters to prevent unauthorized access or tampering with router settings.
l Enable Firewall and Security Protocols: Activate the router's built-in firewall function to block potential network attacks and malicious access. Also, enable WPA2 or WPA3 encryption protocols to provide a higher level of encryption protection for the wireless network, ensuring the security of data transmission.
Monitoring and Maintenance
l Real-time Network Monitoring: Use the WavRouter App or Web UI to monitor the network status in real-time, viewing information such as the number of connected devices, data traffic, and signal strength. Regularly check the network operation and promptly identify and resolve potential issues. For example, if a device frequently disconnects, check its signal reception and adjust the antenna angle or device position to improve connection stability.
l Regular Firmware Updates: Pay attention to firmware update information released by WAVLINK and regularly update the router's firmware. New firmware may include performance optimizations, feature upgrades, and security patches. Timely updates help improve the router's performance and security. For example, a firmware update may fix a security vulnerability in a previous version, enhancing the router's protective capabilities.
By following these special installation tips, you can fully leverage the powerful features of the WAVLINK WN573HX1 series routers to create an efficient, stable, and secure outdoor WiFi network. This will meet the network needs of various outdoor scenarios and provide a seamless network connection experience.


